Stay Clear of Inlets: Hidden Currents Kids Can’t Beat
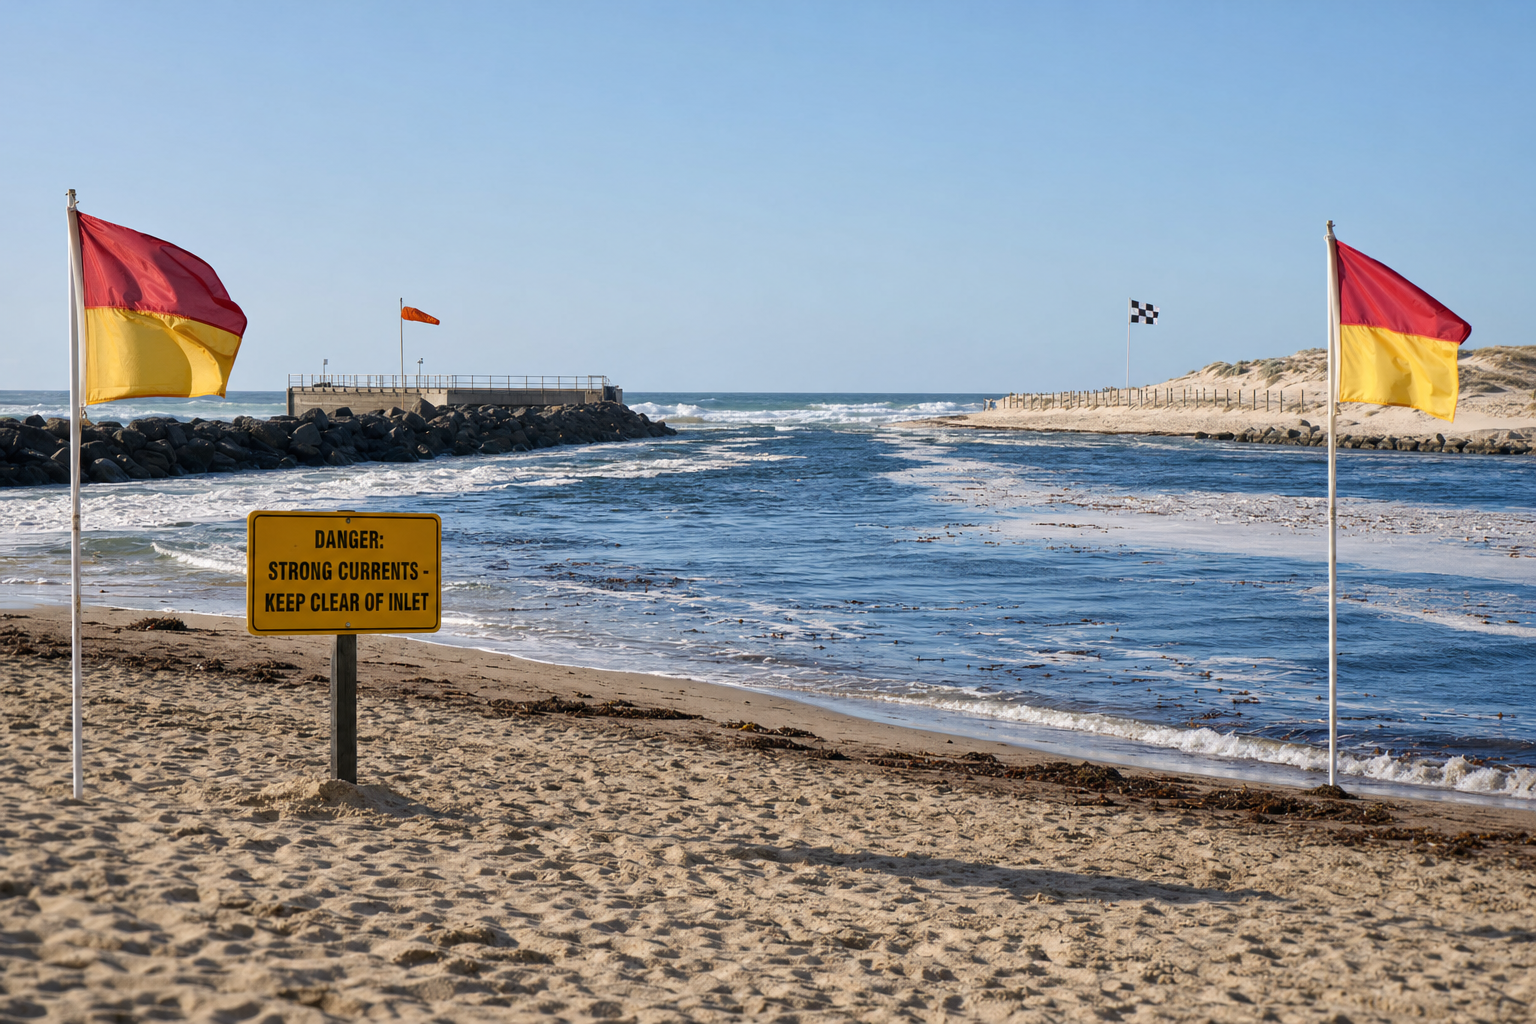
Even on a calm-sounding beach day, inlet mouths, harbour openings, piers and jetties can hide powerful currents. These outlet and structural currents sometimes travel beneath the surface or between slow-moving waves—out of sight, but too strong for kids, even those who swim well.
What Exactly Are Inlet and Rip Currents?
Inlet currents occur where tidal water or river water moves through a narrow opening into the ocean or estuary. Even if the sea surface looks glassy, water moving through that small exit point is being sucked outward, forming strong flow kids can’t swim against. Rip currents are similar but often found between sandbars or near breaking waves—most dangerous near piers or jetties where structural currents combine forces. According to NOAA, rip currents near piers and natural rocks are among the most common causes of trapping swimmers.(nhc.noaa.gov)
These currents are sneaky: at low tide, when sandbars shift and water tries to find pathways to flow out, fast currents pop up in calm-looking zones. Temperatures, sun, even the absence of foam or waves can fool you. But under the surface, kids—even older ones—can be pulled into deeper water or out beyond their reach.
Where Kids Should (and Shouldn’t) Swim
Always choose beaches with lifeguards on duty. Grow familiar with the signs and flags they use—these let you quickly see where it’s safe.
Between red and yellow flags usually marks the lifeguarded, safest zone. Don’t swim outside these areas, especially close to piers or rocky jetties. Black and white chequered flags show zones reserved for surfboards, kayaks or paddleboards—swimmers should stay well away. If an orange windsock is flying, it usually signals strong onshore or offshore wind; inflatables can easily blow into danger in those conditions.(healthdirect.gov.au)
Steep drop-offs near inlet exits are another major risk. Even wading or shallow play can turn dangerous if the bottom suddenly falls away. Fishing areas by inlet mouths often have hidden underwater hazards—rocks, hooks, fishing lines—that can snag kids and leave them vulnerable if current pulls them suddenly.
Spotting the Signs Before It’s Too Late
Teach your kids to look for visual clues: channels of darker, calm water surrounded by breaking waves, foam or debris flowing seaward, or water looking discoloured near piers. These are classic rip indicators. NOAA warns that rip currents can move faster than an Olympic swimmer—so vigilance matters.(oceanservice.noaa.gov)
If you want a structured way to help your child progress at home, the 10-Week Plan guides you step by step.
Also check tide charts. Low tide increases risk because shifting sandbars allow stronger currents to form near inlet channels. Strong underwater flows can be present even when surface looks placid.
[[ctakid]]
Rules, Flags, and Where to Set Up
On lifeguarded beaches, make sure you and your kids swim between red and yellow flags—that’s the patrolled safe zone. If red flag alone is raised, the water is dangerous; no swimming is allowed. Black and white chequered flags or panels mark zones for watercraft—not swimmers. Orange windsocks warn of offshore winds, which often create strong suction near inlets.(manchesterfire.gov.uk)
Set up your family spot well away from surface currents—avoid the edges of rocky piers, jetties, inlet structures. Dig trenches, build sandcastles, and relax on sand that slopes gently into the water if possible. That way kids have safe areas to play.
Swim Training, Pools, and Smart Choices
Week after week of ocean experience helps kids, but even older kids benefit from structured swim skill programs. For example, the 10-Week Plan by swimy.org builds confidence, endurance, and safe habits in open water over several weeks—great for kids aged 6-12 before facing real beach challenges. Participating in supervised swim lessons reduces panic and gives kids strategies to deal with currents.
Some parents choose “pool days” instead of beach days, especially when tide or weather forecasts suggest strong currents near inlets or low visibility. Pools allow full control, zero current risk, and time to have fun without unexpected danger.
What to Do If Your Child Is Caught in a Current
If a kid gets pulled off course, teach them these survival moves: stay calm, don’t try to swim straight back against current—it’s exhausting. Instead, swim parallel until you exit the current’s grip, then head back to shore diagonally. If possible, float or tread water and raise one hand to call for help. Never dive under or try to fight the wave—energy matters more than strength.(oceanservice.noaa.gov)
As a parent, stay close. Keep them in arm’s reach if they’re not strong swimmers. Wear bright swimwear so lifeguards and you can see them. Constant supervision beats rules alone.
Planning and Preparation Makes the Difference
Check tide and surf forecasts, wind direction, and structural maps of the inlet or harbour before heading out. Know the local beach’s flag system and where lifeguards position themselves. Always bring life jackets for weaker swimmers, and consider having water shoes—sometimes rocky inlet beds hide sharp edges.
Pack shade, hydration, first aid. If signs suggest unstable water near inlets—choppy patches, strong wind offshore, or changing tides—consider postponing the beach and hitting a pool instead.
Stay clear of inlet currents safety brings peace of mind. By choosing lifeguarded beaches, reading flags and signs, avoiding structures like piers and jetties, and teaching kids what to watch for, you turn potentially dangerous days into confident beach fun. When in doubt—pool days are always a safe bet.
120+ swimming exercises sorted by age — with video and instructions. Developed by swim instructors, completely free.

120+ swimming exercises sorted by age — with video and instructions. Developed by swim instructors, completely free.